Floral Quilled Greeting Cards for Special Occasions
Quilled greeting cards featuring flowers look dainty and delicate. Despite this appearance they are actually quite sturdy and can be sent safely by mail.
If you haven't tried quilling before may I advise reading the paper quilling instructions first? That page will show you how to shape the coils into the petals and leafs for our flowers. The instructions for folded paper roses are on a separate page.
Quilled greeting cards can incorporate other papercraft techniques such as rubber stamping, embossing, paper piecing, and many more.
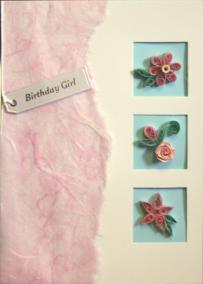
For this handmade birthday card we are using torn mulberry paper to represent a package that has had some of the wrapping paper torn away to reveal the delights within. A tag with a greeting on adds to the effect.
Materials
- White card blank with three square apertures
- Pink mulberry paper
- White thread
- light blue paper
- Printed greeting tag
- 3mm pearlised quilling paper strips in pink, green and lemon
- 6mm pink quilling paper strip
- double sided tape or glue dots
- tacky white glue
- sticky foam pads
How to make our floral card
Start by dampening your mulberry paper where you want to tear it. By doing this you will get the "frayed" edge effect. Keep the left hand edge straight. Tear a slightly longer piece of mulberry paper than the height of your card. Allow it to dry before continuing with your card.It can be difficult to stick this translucent paper in place invisibly so we will only use one glue dot on the front of our card. If we position it carefully we can cover it later with our greeting tag. Place the paper into position with the ends sticking out beyond the top and bottom. Turn the card over and using double sided tape or more glue dots fold the excess over onto the inside of the card and stick in place.
Cut a piece of blue paper large enough to cover the inside of your card. Stick in place to hide the folded edges of mulberry paper. This paper will show through out apertures to create a contrasting background for our quilled flowers.
To finish the basic card pass your thread or fibre through the hole in your tag, and tie the ends around the folded card. Trim the ends of your fibre short. Stick the tag in position with sticky foam pads.
Flowers for our quilled greeting cards
Each aperture in our card features a different type of flower.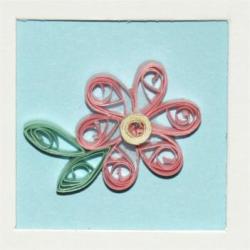
Top flower for our quilled greeting cards
To make this teardrop petal flower use the pearlised 3mm pink paper and roll 6 coils from 1/4 lengths of paper. To help get all your petals the same size use your quilling board to let the coils open up and "relax" into similar sized circles.Use a tiny dab of PVA glue to hold the end of the coil in place then shape into teardrops as explained in the basic paper quilling instructions. You may want to use the Print button at the bottom of that page to print out the instructions to keep to hand.
You will also need a tight coil for the centre of the flower, from 1/8th length of the pearlised lemon paper, this time glue before letting the paper loose from your quilling tool.
To complete the quilling for the top aperture in our quilled greeting cards make two pearlised green leaves from 1/8th lengths of paper. This time squeeze them into marquise or eye shapes.
Assembling the flowerUsing a cocktail stick dab a tiny amount of glue on the pointed end of your first petal. Press against the second petal and hold until dry. Repeat with all the additional petals forming a circle with all the points in the centre of your flower. Add a spot of glue to the top of your flower in the centre and position the lemon coil.
Decide where you want to put the leaves and again use a tiny amount of glue to set them in place. Allow the assembled flower to dry before moving it off your quilling board and onto the card.
Puddle some glue into a saucer and dip the underside of your assembled flower into the glue. Place on your card and tap into place gently. Leave to dry.
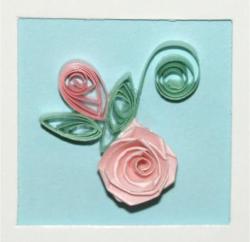
Bottom flower for our quilled greeting cards
This flower only uses 5 teardrop petals, made from 1/4 lengths of pearlised pink quilling paper strips. It differs from the first flower in that we assemble it with the points outwards.
A tight roll for the middle is optional, I have left mine without so you can see the effect.
Again, we use the pearlised green paper (1/8th lengths) to make two marquise leafs.
Assemble as before, using the quilling board (covered with plastic if necessary) then lifting the completed unit and attaching it to your quilled greeting cards as before.
Folded paper roses
Follow the link for instructions on how to make folded paper roses from the 6mm pink paper. I used a 15cm long strip for mine.Take a 1/4 length piece of pearlised green paper to make the scroll and one leaf. Fold the paper in half and roll one end away from the fold until a short length of uncoiled paper is left before the fold. Release from the quilling tool. Roll the other half of the paper right up to the fold and release. This second coil needs to be stuck down as for a normal closed coil. Then pinch it into a marquise or eye shape.
Make a normal green eye shape for the other leaf from 1/8th length.
Finally make a pearlised pink teardrop for the rose bud from 1/4 length strip.
Assembling the folded paper rose and bud
Glue the rose bud to the combination piece of loose coil and leaf. Then attach the second leaf to the other side of the bud.
Attach the leaf construction to the side of the folded paper rose and when dry dip into the glue and stick into place on your quilled greeting cards.
Although simple in construction this pretty handmade card will delight and enthrall whoever receives it. You can be sure it will stand out amongst all the shop bought cards on the shelf!
Once you have learned the techniques why not be adventurous and make more quilled greeting cards by changing the color scheme or the layout of the flowers. You may want to use printed wrapping paper instead of the mulberry paper. My advise would be not to add too much extra or the quilling won't take center stage. And you wouldn't want to spoil the effect of your hard work would you?
Christmas Quilling Designs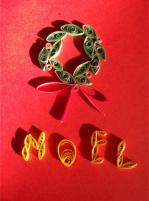 | Handmade Birthday Cards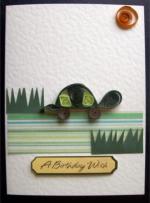 | Handmade |


Creative Crafts
by Jaclynn of All Trades
launching in March 2017!
Recent Articles
-
Getting Started Crafting Again
Aug 11, 21 02:02 PM
I would like to share my crafting story. I used to craft quite a bit, but quit a few years ago. Then, an acquaintance suggested I check out Pinterest. -
Coloring Book Art
May 17, 18 03:33 PM
 I was off from work in 2010 due to possible surgery. I was looking for an arts and crafts project. I bought coloring books for my granddaughter; who was
 -
Heart Shaped Boxes for Loved Ones
May 17, 18 01:33 PM
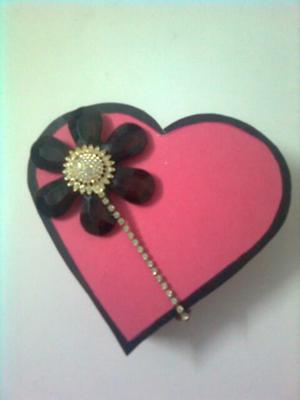 I am crazy about making cards and other crafts and love to share these with other people. I made this heart shaped box with rich pink card stock, decorative


