Paper Quilling - How to Quill a Tortoise
An easy paper quilling project
Paper quilling is fun and easy. Let's start by making this cute little tortoise. This pattern uses a selection of simply shaped closed coils.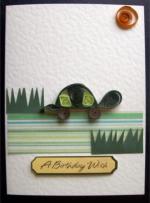 I used paper quilling strips that were 62mm in length and 3mm wide, in dark green, dark brown and light green to make my tortoise. In case your strips are a different length I have given instructions in full lengths, 1/2 lengths and 1/4 lengths. Just fold the piece in half and tear (do not cut with scissors or the sharp edge will be more difficult to hide when you glue the shapes) then use either a slotted quilling tool, needle tool or your fingers to roll the coil as explained in the basic quilling instructions.
 To show you the different results of rolling with a slotted tool or your fingers, I worked one foot using each method. You can see on the tortoise's front foot that there is a folded "tag" showing in the centre hole. This foot was made using the slotted tool. Using your fingers prevents this and leaves a smaller, circular hole as in the back foot.
How to make the quilled shapes
Following the diagram below for strip lengths and colours roll the shapes required.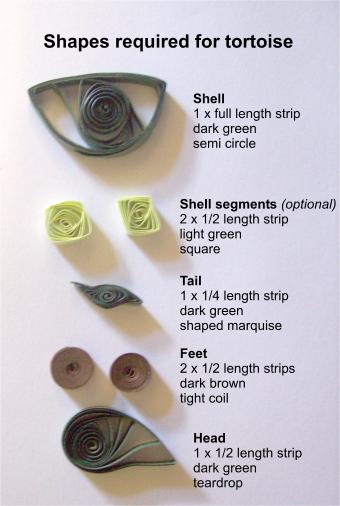
Assembling your tortoise
The next photograph shows how to assemble your pieces to make your tortoise. Use white tacky glue that dries clear, applied with a cocktail stick in VERY small amounts. Work on your quilling board, covered with plastic, to arrange each piece and stick them together.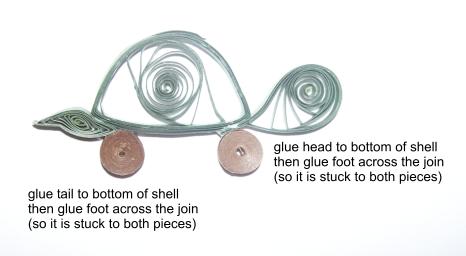
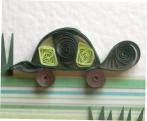 If desired you can use the optional light green shapes to create the effect of tortoise shell. To insert them in the dark green shell section I used the needle tool to gently push the coils aside and dropped the light green square into place. I didn't stick them to the shell, as it is difficult to avoid getting glue where you don't want it. I glued them into place on the finished card when I glued the rest of the tortoise instead.
Instructions for completing the card are on the handmade birthday cards page.
If you are a tortoise fan you may enjoy a site I found called totallytortoise.com where you will find videos, jokes and facts about chelonians. (I learned that term for tortoises from that site, cool eh?).
Quilling Instructions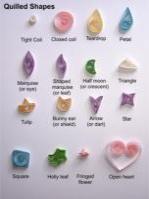 The place to start to learn how to quill. Try the craft with free quilling patterns. | Folded Paper Rose How to make envelopes...to protect your quilled cards | Quilled Baby Cards What is quilling?An introduction to paper quilling or filigree. |

