Quilled Baby Cards
Quilled baby cards are a wonderful momento of a new addition to the family.
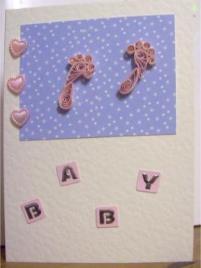
This card is simple to make, but so cute. The quilled footprints sit on top of a background paper covered with little stars and dots. Three heart embellishments signify "baby makes 3" and the love between all members of the new family. I have used letter tiles to spell out "BABY" but you could include the child's name to make the card even more personal.
Materials
- C5 Cream (or white) textured card
- Background paper of your choice
- Three heart embellishments
- Letter tiles
- Pale pink (or skin coloured) quilling paper - 3mm wide
- Glue dots and tacky glue
Preparing the card
Score and fold the card. Quilled baby cards can be cream or white or any pastel colour.
Cut a rectangle of background paper (mine measured 8.5 x 6.5cm) and using glue dots or double sided tape attach it to the top half of the card.
Using tacky PVA glue attach the heart embellishments to the left hand side. Either make sure these are lined up accurately and evenly spaced or make it obvious that they aren't meant to be! I positioned mine at different angles to give a little movement and interest to the card.
Attach letter tiles with tacky glue, again position in a seemingly haphazard way or make sure they are all lined up and evenly spaced. Try not to move them once they have been placed on the card, otherwise remnants of dried glue may spoil the card.
Quilled baby footprints
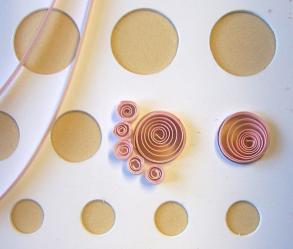
For this design our shapes need to be the same size as each other to look good. This is where a quilling board with different sized circular moulds can help. Once you have rolled your closed coils drop them from your quilling tool into the second smallest circles and let them "relax" or unwind to fit the mould. Holding the coil in place on the quilling tool for 15 seconds can help the paper to settle into its new shape before you release it.
We need to make 4 circles from 7" long strips of quilling paper. Then we need to roll tight coils for our two big toes from 2.5" lengths and 8 other toes from 1.75" lengths. Glue these before releasing them from the quilling tool.
Shape the four larger shapes into petal shapes (a teardrop with a curl to one side). For instructions on how to form the different shapes see our basic paper quilling instructions.
Assemble the footprints for your quilled baby cards by sticking the pointed ends of two petal shapes together, remembering to make a pair of feet!. Check the photo at the top of this page to see in which direction they need to face. Then put a tiny dot of glue on the toe end of the foot and add the big toes. For the rest of the toes, place a little glue on both the previous toe and the top of the foot before positioning the tight coils. Reverse the position of the toes for the other foot.
Lastly position the footprints on the card (make sure the big toes are in the right place!) and when you are happy with their placement, gently apply glue to the back of the quilled pieces and stick down.
I think you will agree that quilled baby cards don't have to be complicated or busy to be effective.
What Is QuillingAn introduction to this ancient craft of quilling or paper filigree.Quilling Tools and Equipment What do you need for quilling? | Quilling Instructions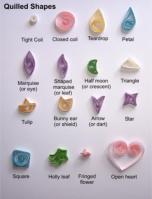 The place to start to learn how to quill. | Floral Greeting Card Quilled flowers are always popular. |
Creative Crafts
by Jaclynn of All Trades
launching in March 2017!
Recent Articles
-
Getting Started Crafting Again
Aug 11, 21 02:02 PM
I would like to share my crafting story. I used to craft quite a bit, but quit a few years ago. Then, an acquaintance suggested I check out Pinterest. -
Coloring Book Art
May 17, 18 03:33 PM
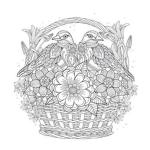 I was off from work in 2010 due to possible surgery. I was looking for an arts and crafts project. I bought coloring books for my granddaughter; who was
 -
Heart Shaped Boxes for Loved Ones
May 17, 18 01:33 PM
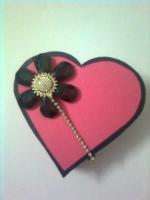 I am crazy about making cards and other crafts and love to share these with other people. I made this heart shaped box with rich pink card stock, decorative


