Folded Paper Roses
for Quilling Projects and More
Paper roses can make attractive additions to your quilling. Although it can take a while to acquire the knack you will soon be creating whole bunches!
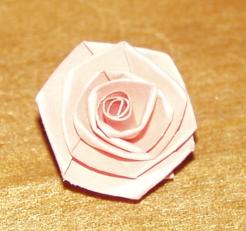 Use a wider paper strip for your roses, from 6mm to 10mm is fine. The wider the strip the higher the rose will stand of the card or backing material. Your beginners slotted tool is best for these as it creates the open center which we need.
Let's Make a Paper Rose!
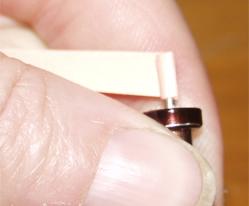
Take your slotted tool and slip the end of the paper through the slot.
Wind for a few turns to created the center of your rose.
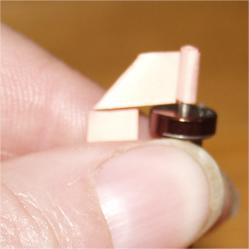
Next fold the paper down at right angles to the back. This is easiest to understand by following the photo.
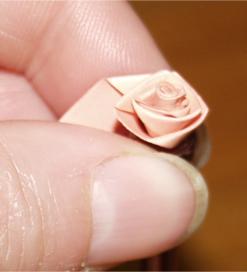
Continue rolling, keeping the bottom of your rose lined up and allowing the folded edge to splay away from the tool. As you reach the end of the folded section, fold the paper again. Keep rolling until you only have a short length of paper left.
Release your rose from the tool and allow to relax slightly. Don't let go completely or your rose will unwind! Push the center of your rose downwards so it shows on the underside of your flower and glue. Fold the remaining tag of paper over to cover the glued center and hold until the glue dries.

And there you have your finished rose. It may take you a few tries to get a rose that you are happy with, but it is well worth the practice.
Now you know how to make folded roses you can use one on our floral quilled greeting cards.
Paper Quilling Instructions | Handmade Birthday Cards | Handmade |


