Easy Handmade Birthday Cards YOU Can Make
Handmade birthday cards are a little bit special. It is wonderful knowing that someone has taken the time and care to make a card just for you.
 Many techniques and skills can be put to use in card making; stenciling, paper folding, embroidery, rubber stamping, or how about quilling?
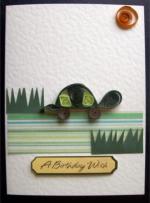
Let us start by making a simple card background that we can then attach a quilled embellishment onto. Instructions for the quilled tortoise are in the free quilling patterns section.
Method
Materials
- Cream C5 textured card blank
- Striped paper or vellum
- Dark green paper
- Printed birthday wish
- Quilled decorations
- Glue dots
- foam pads
- tacky glue
- sharp scissors
If your card isn't already folded, mark and score down the centre, with a bone folder, then fold in half.
Cut your striped paper of vellum to size, the piece I used on this card was 3cm x 10cm, with the stripes running parallel to the longer length. Attach this to your card with a glue dot at each side.
If you are a beginner to making handmade birthday cards look for the re-positionable glue dots rather than the permanent ones as they allow a little bit of movement if you don't get it stuck in the right place first time.
If you imagine the card divided into 4 equal portions, top to bottom, then you will be attaching the paper in the third portion from the top.
Attaching the greeting
Using sticky foam pads attach the greeting, centered, below the striped paper. This will leave it slightly raised off the surface of the card, echoing the raised effect of the quilled motifs.
The message I used was part of a free gift in a card making magazine. If you don't have anything suitable why not use a pretty font and create a greeting on your computer. You could even include the recipients name this way. Just print it onto coloured card and cut it out.
Cutting the grass
Taking the dark green paper, cut it into two rectangles; one 3cm x 2cm and the other 4cm x 2cm. Using sharp pointed scissors snip down at an angle and cut out small triangles from the top of each piece, to create the effect of grass or bushes. Using tacky glue stick these in place, putting the larger piece at the bottom right of the striped paper and the other, above and to the left.
Ideas for finishing your handmade birthday cards
I used the tortoise and a quilled orange circle to represent the sun on my card.
If your striped paper is blue why not use a quilled duck, or even a mummy duck and ducklings to create a water scene. You could add bulrushes amongst the reeds on the riverbank. Just roll some dark brown tight coils for the rushes and use dark green quilling paper for the stems.
Going underwater
To give the effect of reeds growing up from under the water, cut a slit into the striped vellum and poke the green paper through so that some of it looks as though it is underwater. You could even quill a grey shape and use it as a partly submerged rock in front of the reeds. Oh dear I could get really carried away here! Next I would add some frothy white quilled open coils to represent breaking wavelets against the bottom of the rock. Or maybe place a paper cut out fish under the vellum.
Actually this would be an ideal place to talk about when to stop! It is too easy to get carried away and keep adding more and more to your card. Often it is the simplest designs that are most effective. A good rule is to stop when you still think something needs adding.
I hope you have enjoyed introduction to making handmade birthday cards. If you have a go and come up with another variation on this theme please do drop me a line (by clicking on the contact button at the top of this page) and share it.
Pop Up Handmade Birthday Cards
I love making pop up birthday cards. They are so fun and such a surprise for the recipients. It doesn't take much to learn the basics and then, the sky's the limit. Below are two videos outlining the basics. From there I often add several pop ups within one card and layer pop ups within pop ups. The creative opportunities for this handmade craft just never end.
But first... you'll need to learn the basics... oh... and my advice... go with the cover card mentioned at the end of video two. It makes the whole card look more professional. Have fun!
Pop Up Card Instructions - Part 1
Pop Up Card Instructions - Part 2
Creative Crafts
by Jaclynn of All Trades
launching in March 2017!
Recent Articles
-
Getting Started Crafting Again
Aug 11, 21 02:02 PM
I would like to share my crafting story. I used to craft quite a bit, but quit a few years ago. Then, an acquaintance suggested I check out Pinterest. -
Coloring Book Art
May 17, 18 03:33 PM
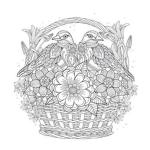 I was off from work in 2010 due to possible surgery. I was looking for an arts and crafts project. I bought coloring books for my granddaughter; who was
 -
Heart Shaped Boxes for Loved Ones
May 17, 18 01:33 PM
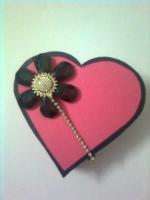 I am crazy about making cards and other crafts and love to share these with other people. I made this heart shaped box with rich pink card stock, decorative


